
Transform Your Vehicle’s Interior: DIY Detailing Made Simple

A clean and well-maintained car interior not only feels great but also protects your investment. Learning how to detail your own car interior can help you save money, extend your car’s lifespan, and keep it looking like new. From removing stubborn stains to tackling lingering odors, detailing can dramatically improve your driving experience. Whether you’re a car enthusiast or just want to restore some shine to your daily driver, this guide will show you exactly what to do to achieve a professional-grade finish.
Understanding the Basics of Interior Car Detailing
A clean car interior goes beyond aesthetics—it’s about comfort, hygiene, and maintaining the value of your vehicle. When you understand the basics of interior car detailing, you’ll find that the process isn’t as intimidating as you might think. Armed with the right tools, knowledge, and a little effort, you can transform your car’s interior into a fresh, comfortable space.
Benefits of a Clean Car Interior
Keeping your car’s interior clean isn’t just about appearances; it plays a crucial role in your health and your overall driving experience. Imagine stepping into your car and being greeted by fresh air, spotless surfaces, and no lingering grime. Doesn’t that sound better than a dusty, cluttered environment?
- Healthier Environment: Dust, allergens, and bacteria can build up in your car over time, especially on your seats, mats, and dashboard. These particles can irritate your skin and respiratory system, leading to sneezing fits or allergies while driving. A clean interior helps eliminate these irritants, creating a healthier space for you and your passengers.
- Improved Driving Focus: A clean car isn’t just easier on your eyes; it’s easier on your mind too. Clutter and mess can be distracting. When your car interior feels organized and pleasant, you’ll find it easier to focus on the road, enhancing your overall safety.
- Odor Control: Let’s face it, cars can develop strange smells—spilled drinks, food crumbs, or moisture from wet shoes can leave a lingering odor. By detailing your car interior, you can eliminate the sources of these smells and replace them with a fresh scent that makes driving more enjoyable.
- Longer Lifespan for Materials: Dirt and grime trapped in upholstery and on surfaces can wear down materials like leather or fabric and leave your car looking older than it is. Routine cleaning helps preserve these materials, keeping your car looking newer for longer.
Tools and Supplies You’ll Need
Before you start detailing your car interior, having the right tools and supplies can make all the difference. Without them, you might find yourself frustrated with streaks, missed dust, or even accidental damage to your car’s materials. Here’s a list of essentials you’ll need for the job:
- Vacuum Cleaner: A portable vacuum with multiple attachments is a must for cleaning car interiors. Look for options with a crevice tool to reach tight spaces like between seats and under the dashboard
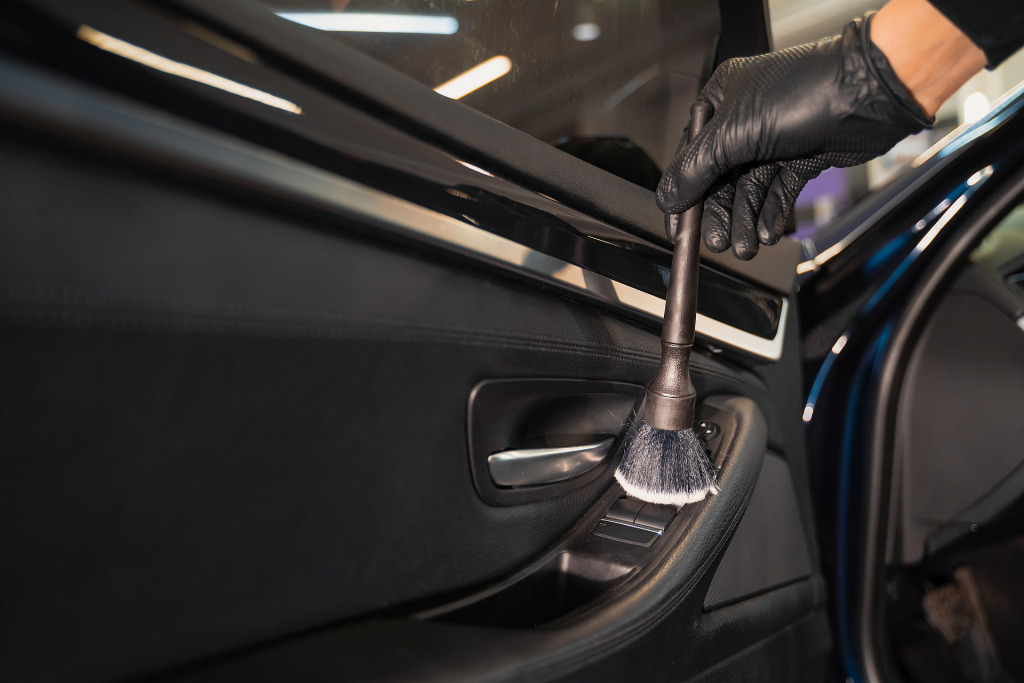
- Soft-Bristled Brushes: Brushes of various sizes come in handy for loosening dirt from air vents, dashboard crevices, and around buttons. Use soft-bristled brushes to avoid scratching delicate surfaces
- Microfiber Towels: These are non-negotiable. Microfiber towels are perfect for wiping surfaces, as they’re gentle and highly absorbent. They leave no lint behind, which makes them ideal for glass and interior trim.
- Detailing Brushes: These finer brushes are perfect for cleaning seams in leather seats or textured plastics that trap dirt. They’re designed to get into hard-to-reach spots without damaging interior materials.
- All-Purpose Cleaner: A good all-purpose cleaner can be used on most surfaces, including plastic and vinyl. Make sure it’s safe for automotive interiors to avoid discoloration or damage.
- Leather Cleaner/Conditioner: If your car has leather seats, invest in a leather cleaner and conditioner. This not only removes grime but restores the softness and flexibility of the leather, preventing cracks.
- Upholstery Cleaner: Cloth upholstery requires a fabric-safe cleaner to remove stains without damaging the material. Use something designed for automotive fabrics for the best results.
- Glass Cleaner: Streak-free visibility is key when you’re on the road. A good glass cleaner ensures your windows, mirrors, and windshield are spotless and free from smudges.
- Floor Mat Cleaner: Don’t forget about the mats! Rubber mats can be scrubbed with soap and water, while carpet mats require a cleaner designed for fabric.
- Compressed Air Canister: This tool is excellent for blowing out dust from tight areas like air vents, buttons, and cup holders.
- Trash Bags: Keep a trash bag handy to collect any waste or debris you remove during the cleaning process. It’s an easy way to stay organized and keep the workspace tidy.
Having these tools ready ensures you won’t waste time hunting for supplies once you start working. Plus, using the proper equipment helps protect your car’s materials and leaves you with a professional-grade finish.
Step-by-Step Guide to Detail Your Car Interior
Detailing your car interior may seem overwhelming, but breaking it into manageable steps makes it more approachable. With a few basic tools and some patience, you can clean and refresh every surface of your car like a pro. Follow this step-by-step process to transform your vehicle’s interior into something you’ll actually enjoy spending time in.
De-cluttering and Preparing Your Car
Before diving in, you’ll need to clear the space. Start by removing all personal items, whether it’s loose change, water bottles, or leftover fast food wrappers. Don’t forget to check under the seats and inside storage compartments. Gather anything you want to keep and remove any waste.
Once the clutter is gone, grab a trash bag and thoroughly collect all the trash, even tiny scraps. If you leave debris behind, it’ll just get in the way as you clean. After decluttering, slide the seats forward and check those hidden nooks—you’d be surprised how much junk hides there.
Finish up the preparation by taking out your floor mats. This will not only make them easier to clean later but also give you full access to the floor underneath. With everything out of the way, you now have a clean slate to work with.
Vacuuming and Dusting the Cabin
Now that you’ve prepared the space, it’s time to tackle the dirt. Use a vacuum cleaner with attachments to remove dust and debris from your car’s interior. Start with the seats, moving from top to bottom to avoid reintroducing dirt to cleaned areas. Next, vacuum the carpets, making sure to press the nozzle firmly to remove embedded dirt.
For those hard-to-reach areas—like the cracks between seats or along the edges of the floor—switch to a crevice tool. It’ll help you suck up crumbs and dust from tight spaces.
Don’t overlook the dashboard, vents, and buttons. Instead of the vacuum, use a soft-bristled brush or a can of compressed air to break up and collect dust from these delicate areas. Follow up with a microfiber cloth to wipe down these surfaces without scratching them.
Cleaning Upholstery and Surfaces
Every material in your car’s interior needs a slightly different approach to cleaning. Here’s how you can handle common materials:
- Fabric Seats: Use an upholstery cleaner designed for car interiors. Spray the solution lightly, scrub with a gentle brush, and then blot dry with a microfiber cloth.
- Leather Seats: Gently clean leather with a damp cloth and a leather cleaner. Avoid soaking the material—use a conditioner afterward to keep the leather soft and prevent cracking.
- Plastic and Vinyl Surfaces: Spray an all-purpose cleaner onto a microfiber cloth (not directly on the surface) and wipe areas like the dashboard, door panels, and center console. Buff the surface dry to prevent streaks.
No matter the material, always test any cleaner on a small, hidden spot first to make sure it doesn’t cause discoloration or damage.
Deep Cleaning Carpets and Floor Mats
Carpets and floor mats endure some of the harshest abuse, from muddy shoes to accidental spills. To properly clean them, start by giving them a thorough vacuuming. Remove as much dirt as you can before introducing moisture.
- Carpets: Use a carpet cleaner or a steam cleaner to lift dirt and stains from the fibers. Focus on high-traffic areas like the driver’s side footwell. Scrub stubborn spots with a brush, if necessary, and let the carpet dry completely before replacing the mats.
- Rubber Mats: If you have rubber or all-weather mats, scrub them with soapy water using a stiff-bristled brush. Rinse thoroughly with water and let them air dry before reinstalling.
Deep cleaning not only improves the appearance of these surfaces but also gets rid of odors caused by trapped grime.
Finishing Touches: Polishing and Sanitizing
Once your car is clean, adding some finishing touches will make a big difference. Start by applying a fabric or upholstery protector on your seats and carpets. These products create a barrier against spills and stains, making future cleaning easier.
For plastic and vinyl surfaces, consider using a specialty polish to restore shine and leave them looking like new. Be careful not to overdo it—too much polish can make surfaces greasy or attract more dust.
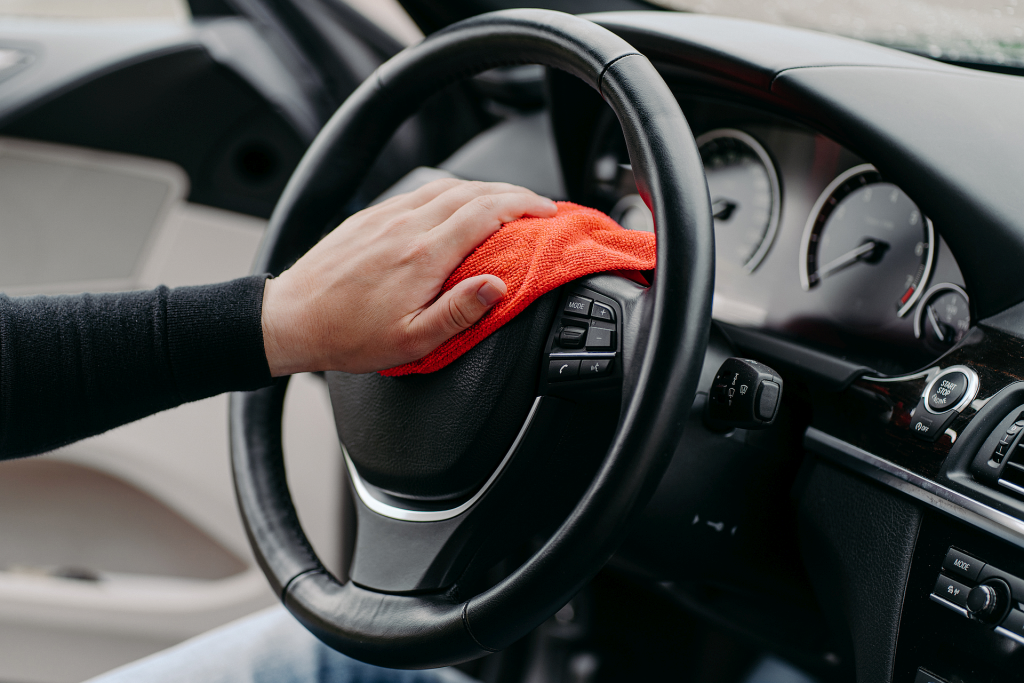
Finally, don’t skip sanitizing. Use a disinfectant spray or wipes on high-touch areas like the steering wheel, gear shifter, door handles, and seat belts to eliminate bacteria and germs. As a final step, place an air freshener or use an odor eliminator for a pleasant, long-lasting scent.
With these finishing touches, you’ll not only have a spotless interior but a healthier and more enjoyable space to spend your time in.
Maintaining a Clean Interior
Keeping your car’s interior clean doesn’t need to be a monumental task. With consistency and the right tools, you can maintain a spotless and organized space that feels fresh every time you step in. A clean interior not only looks great but also helps extend the life of your car’s materials and creates a more pleasant driving experience. Let’s explore how small habits and smart accessories can make a big difference.
Regular Cleaning Habits
It’s always easier to maintain cleanliness than it is to recover from neglect. By establishing a few simple cleaning habits, you can prevent dirt and grime from taking over your car’s interior.
- Weekly Cleanups: Set a time each week to quickly clean your car. This doesn’t have to be an all-day project! Give the floors a quick vacuum, wipe down high-touch areas like the steering wheel, and throw away trash. These small efforts will keep dirt from building up and turning into a bigger job later.
- Deal with Spills Immediately: Life happens—spills are a part of it. Whether it’s coffee on the center console or a juice box on the back seat, address messes as soon as they happen. You can keep a pack of cleaning wipes or a small bottle of all-purpose cleaner in your car to make cleanups easy and immediate. The longer spills sit, the harder they are to remove, and they often lead to lingering stains or odors.
- Empty the Trash Regularly: Trash has a way of multiplying in cars. Prevent clutter by keeping a small trash container in your vehicle. This could be as simple as a plastic bag or a reusable car trash bin. Make it a habit to empty it every time you fuel up or finish a trip.
Think of regular cleaning like brushing your teeth—it doesn’t take long, but it prevents bigger issues down the road.
Using Protective Covers and Accessories
If you want to minimize wear and tear, make use of protective covers and accessories. These small investments can save you from a lot of maintenance work, especially if your car endures heavy use, carts around kids, or transports pets.
- Seat Covers and Floor Mats: Protect your seats and floors with covers designed for your car’s specific dimensions. Seat covers not only shield your upholstery from stains, spills, and crumbs but also keep materials like leather and fabric from fading due to sun exposure. For floors, consider rubber or all-weather mats that trap dirt, water, and debris. These are much easier to clean than the carpet beneath them—simply remove them, rinse, and you’re set.
- Car Organizers: Decluttering starts with having a place for everything. Add an organizer for your trunk or back seat to store loose items like groceries, toys, or sports gear. For the front seats, consider a small console organizer to keep daily essentials like sunglasses, cords, or snacks neatly stored. These simple accessories can make your car feel less chaotic and reduce the chances of items causing messes.
- Sun Shades: Prolonged exposure to the sun can fade and crack your interior surfaces over time. Use a windshield sun shade to block harmful UV rays and keep your dashboard, seats, and steering wheel in better condition. They also help maintain a cooler interior temperature, which is a bonus during hot months.
By using these protective tools, you’re essentially adding a barrier between your car’s interior materials and everyday damage. It’s like putting on a raincoat before heading out in a storm—it only takes a minute but can save you from a lot of trouble later.
Maintaining your car’s interior doesn’t have to be overwhelming. A combination of consistent habits and smart preventative measures can help you keep it feeling fresh for years to come. Plus, these steps will make future detailing sessions quicker and more effective. Who doesn’t love that?
F.A.Q About Car Interior Detailing
When detailing your car’s interior, you’re bound to have questions—especially if this is your first attempt. From wondering how to improvise with household items to figuring out how often you need to clean, this section answers some of the most common questions about interior car detailing.
What If I Don’t Have Specialized Tools?
Don’t have all the fancy gadgets? Don’t worry—you can still detail your car effectively with items you likely have at home. Sure, specialized tools are helpful, but improvising can get you surprisingly good results. Think about it: you wouldn’t skip brushing your teeth just because you don’t have the “perfect” toothbrush, would you?
Here are some alternatives to common car detailing tools:
- Clean Toothbrush: A toothbrush with soft bristles can act as a detailing brush for small crevices, buttons, or air vents. It’s ideal for breaking up dust and dirt in tight spaces.
- Vacuum with Attachments: Don’t have a fancy handheld vacuum? Use your regular vacuum with a hose attachment. Wrap the nozzle with a microfiber cloth for delicate surfaces.
- Baking Soda: For carpets and upholstery with lingering odors, sprinkle baking soda on the surfaces and let it sit for 15-20 minutes before vacuuming. It’s a natural deodorizer and safe for most fabrics.
- Dish Soap and Water: Dilute a small amount of dish soap in warm water to clean plastic or vinyl surfaces. Use a microfiber cloth to wipe everything down gently.
- Old T-Shirts or Socks: These can replace microfiber cloths in a pinch for wiping down dashboards, consoles, or even cleaning windows.
The key is to get creative and use what you have. Just make sure whatever you use is clean and non-abrasive to avoid damaging your car’s surfaces.
How Often Should You Detail Your Car Interior?
How often you should detail your interior depends a lot on your personal habits and lifestyle. There’s no one-size-fits-all answer, but here’s a simple rule: the more use (or abuse) your car takes, the more often you’ll need to clean it.
Here’s a breakdown based on different lifestyles:
- Every 3-4 Months: For the average driver who doesn’t eat or drink often in the car, full interior detailing once every few months is usually enough. This helps to maintain cleanliness and prevent dirt buildup.
- Monthly: If you have kids, pets, or regularly eat in the car, aim for a monthly deep clean. Between crumbs, spills, and pet hair, dirt accumulates much faster in these cases.
- After Long Road Trips: Took a road trip or used your car for a big event? Detail it as soon as possible. Dirt, crumbs, and trash left unattended can quickly turn into stains or unwanted smells.
Think of it like cleaning your home—you don’t wait for it to get out of hand before tidying up. Regular maintenance keeps your car feeling fresh and makes future cleaning much easier.
Are DIY Cleaning Solutions Safe?
You might be tempted to whip up your own cleaning solutions at home, but are they safe for your car’s interior? In most cases, yes—as long as you’re careful about what you use. Homemade solutions can save you money and work well, but you need to know your car’s materials and how they’ll react.
Here’s a quick rundown of common DIY solutions and their safety:
- Vinegar and Water Solution: A mix of equal parts white vinegar and water can be used for cleaning windows, dashboard surfaces, and even vinyl seats. However, avoid using it on leather, as the acidity can dry it out and cause cracking over time.
- Baking Soda Paste: By mixing baking soda with a little water, you get a gentle yet effective scrub that’s safe for fabric, carpets, and plastic surfaces. It’s a great option for stain removal without any harsh chemicals.
- Mild Dish Soap and Water: This is excellent for wiping down plastic or vinyl surfaces. Use a small amount, as too much soap can leave a residue. Test it first on an inconspicuous area to ensure no discoloration.
- Rubbing Alcohol: A 70% isopropyl alcohol solution works well for sanitizing high-touch surfaces like the steering wheel, buttons, and door handles. However, avoid overusing it on soft touch materials, as it may dry them out.
When using DIY solutions, always test them in an inconspicuous spot before applying them to the entire surface. This precaution helps you avoid unexpected discoloration or damage. And remember, less is more—don’t oversaturate surfaces, as it can lead to moisture damage, particularly in fabrics or on electronic components.
Homemade cleaners can be highly effective, but you have to use them wisely to get the best results. By understanding what works and what doesn’t, you can safely and confidently detail your car’s interior without splurging on commercial products.
Conclusion
Detailing your own car interior is simpler than it seems when you break it into steps. By following this guide, you can achieve a clean, fresh, and healthy space without relying on professionals. The benefits go beyond appearances—you’ll drive in comfort, protect your car’s materials, and even save money in the long run.
With the right tools and a little time, you’ll see how satisfying it is to transform your vehicle into something that feels brand new. Why not try it this weekend? Grab your supplies, give it a go, and share your results in the comments. Taking care of your car is an investment in both its value and your driving experience—starting now will only make it easier to keep up.